Creating and editing your carpool schedule.
- Beeline

- Sep 20, 2020
- 2 min read
Updated: Aug 9, 2021
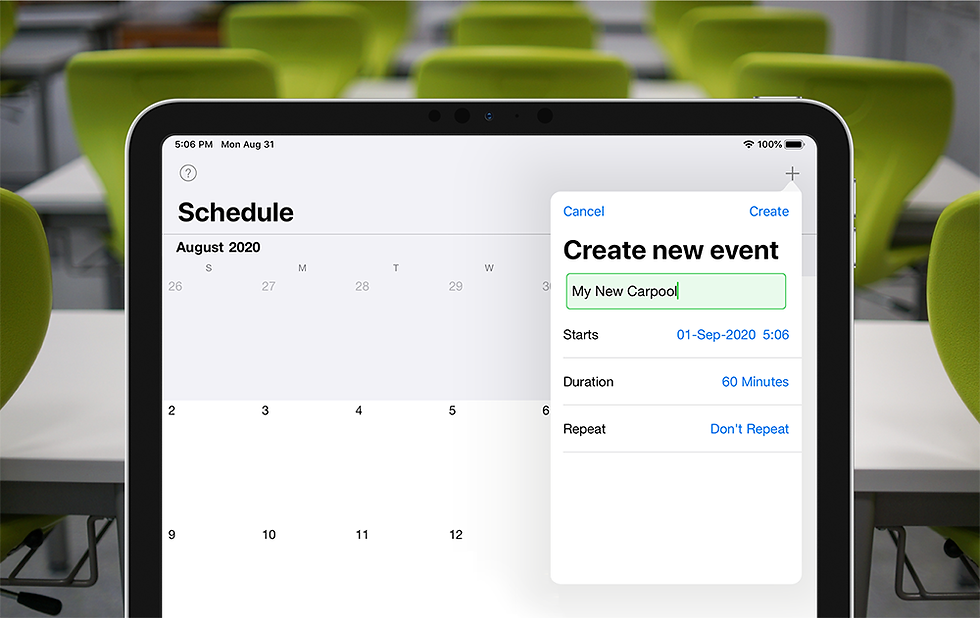
You must schedule carpools ahead of time so that Beeline knows when to watch for cars and run dismissal, so set one up before you plan on running your first carpool. It's easy and quick, and we include a repetition rule editor so you can schedule up to a year in advance.
Setting up your schedule in Beeline is usually something that you'll only need to do once, but with the weather, holidays, and other events, it's also likely you'll have to edit your schedule from time-to-time.
This help document will walk you through the process of creating a new event and editing an existing one.
During a Beeline carpool
Every Beeline carpool you schedule has four stages, each one is optimized to accommodate the needs that usually happen during that time:
Stage one - Wait to start. Once added to your schedule, carpools appear for all users at your location so they can plan around the event.
Stage 2 - Early Arrival. Drivers can be checked in up to one hour prior to the dismissal start time without alerting classrooms. This stage built-in and you don’t have to add the extra time.
Stage 3 - Carpool running. Once carpool starts, kids with drivers who are checked in are notified using the classroom view.
Stage 4 - Carpool ended. Classrooms are notified carpool has ended. Staff can still confirm if a late handoff occurs, but cars can no longer check-in.
Beeline allows you a lot of options to configure your carpool to meet almost any need and how you plan your schedule depends entirely on your carpool plans and how you run your existing carpool.
If you need any help or guidance, this help document will assist you in understanding the steps to create and edit a carpool schedule. If you still find you need additional help or guidance, just give us a shout!


Comments